Home Blog Top Way to Secure a Duvet Cover

Top Way to Secure a Duvet Cover

by Jessica

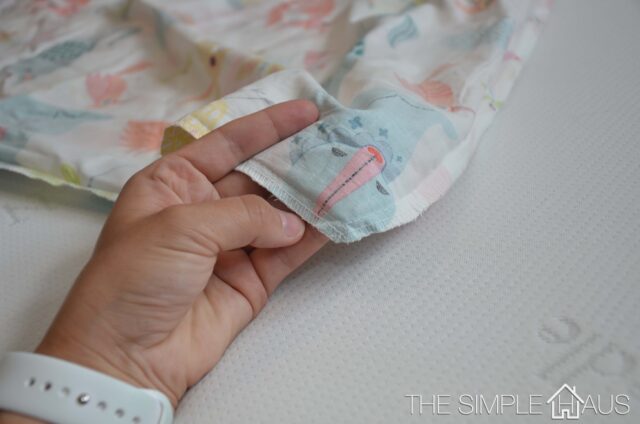
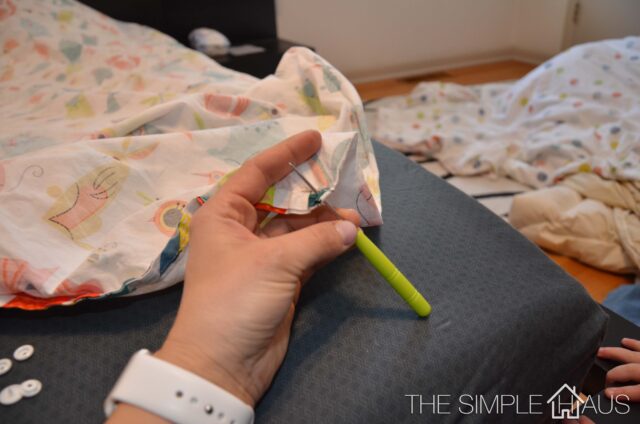
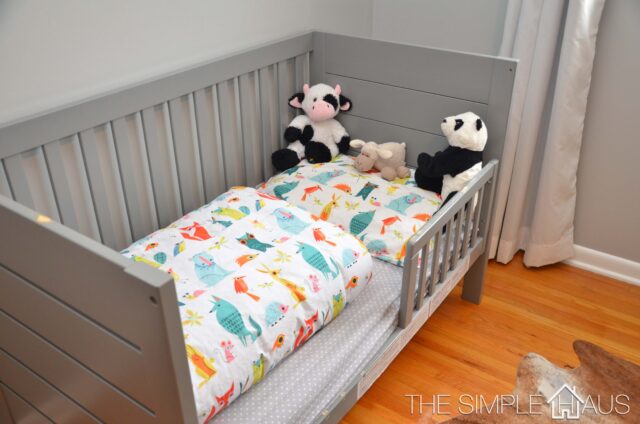
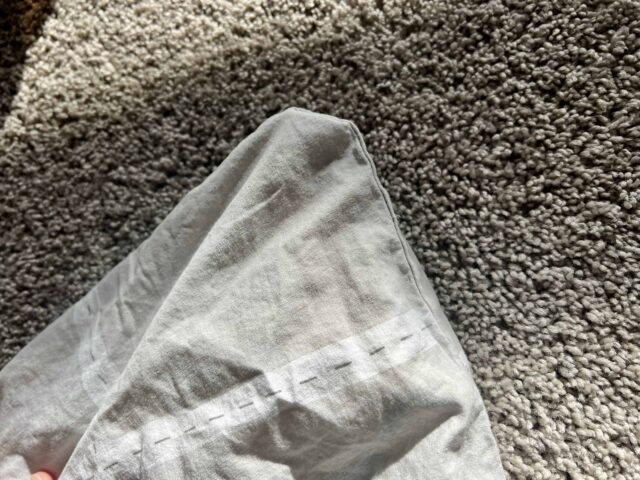
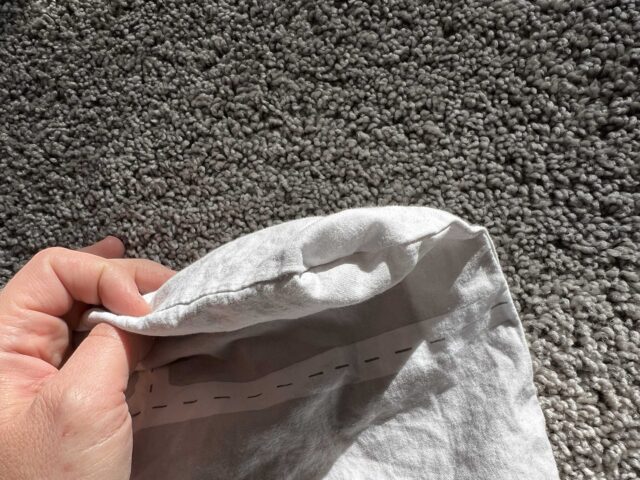
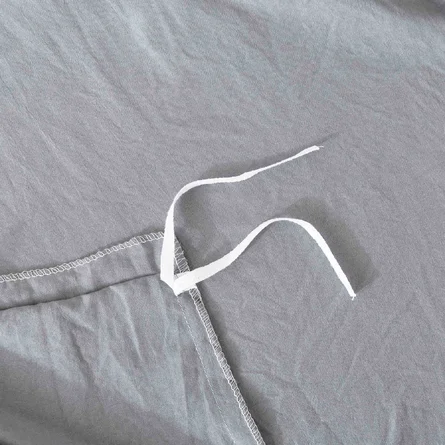
I have been using my favorite way to secure a duvet cover for about twelve years. I never thought much about it until I saw a lot of youtube videos showing how they secure theirs. I honestly thought a lot of the methods were very time consuming or annoying with having to take things off and on. So here I wanted to show you how I like to keep my duvet covers in place, and a few other options at the end of the post that others like to use.

I think Snaps are the best option for securing a duvet cover! You can remove them with one hand, you don’t have to store them or worry about forgetting to take them off. They are very sturdy and once you have the tools can be added to lots of other things. For instance, I add snaps to the openings of duvets if they don’t have a closure system. I added them to cloth diapers that needed a replacement snap. I have added them to toy dog collars, and doll cloth diapers, and you will find all sorts of uses for them.

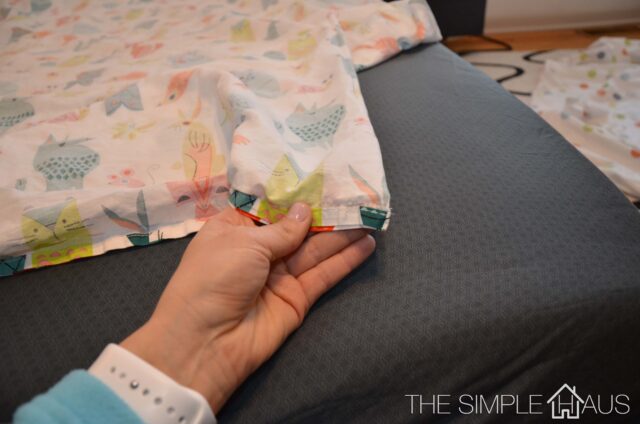
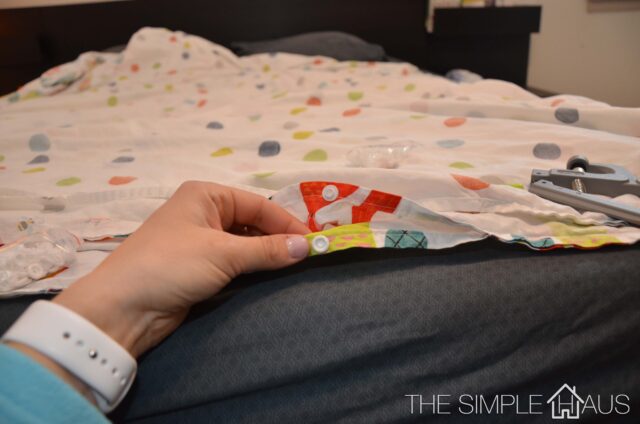
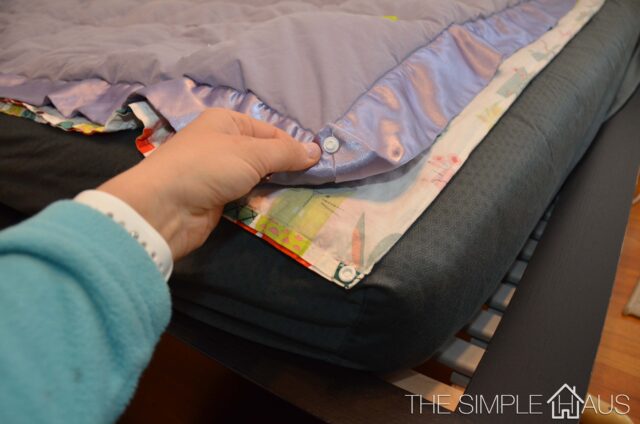
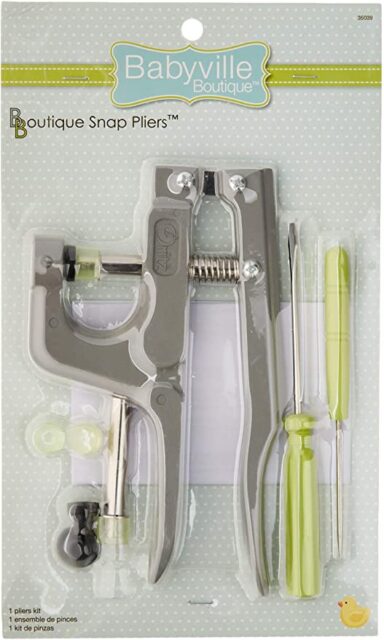
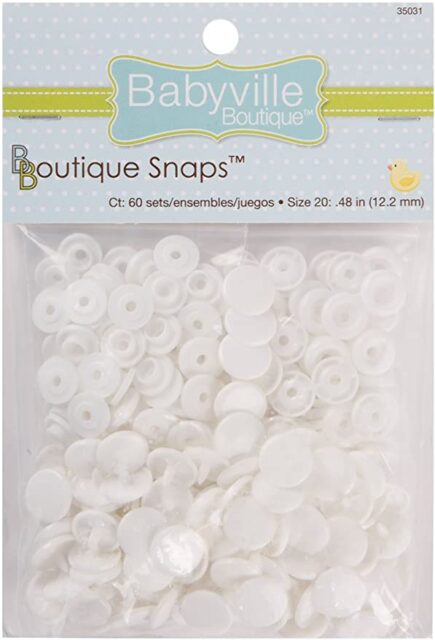
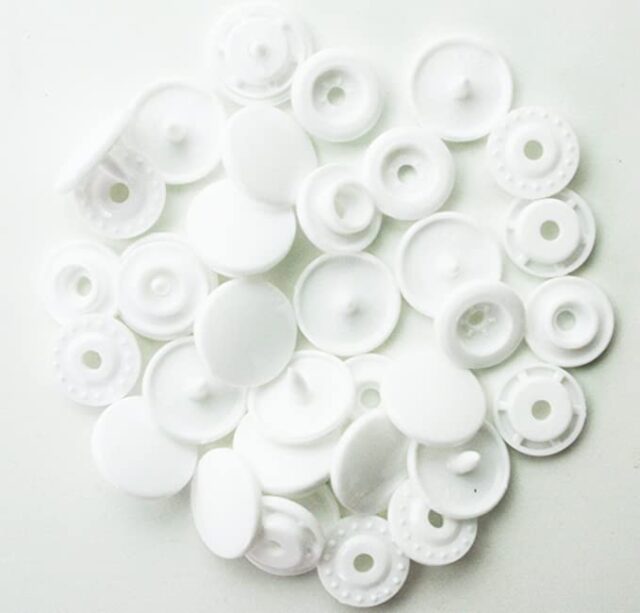
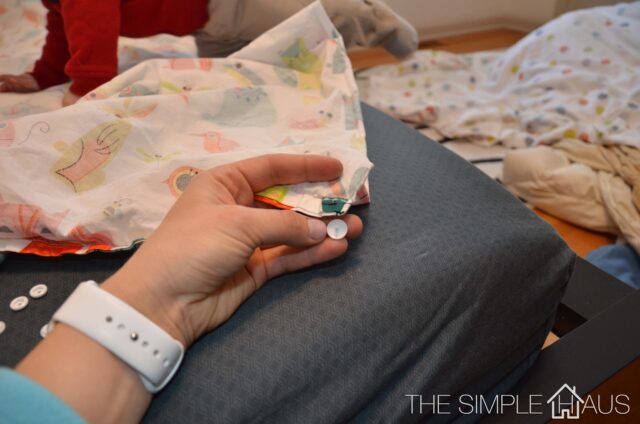
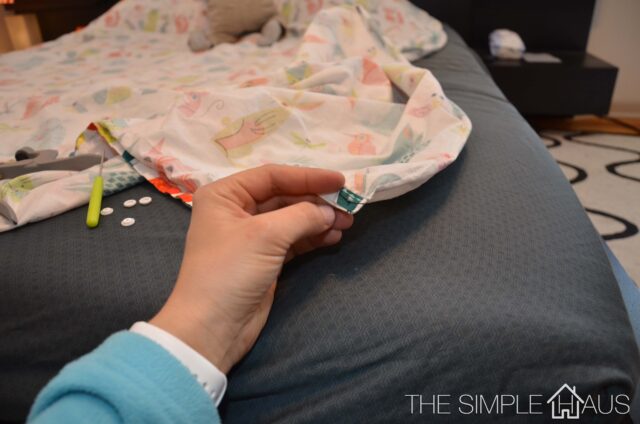
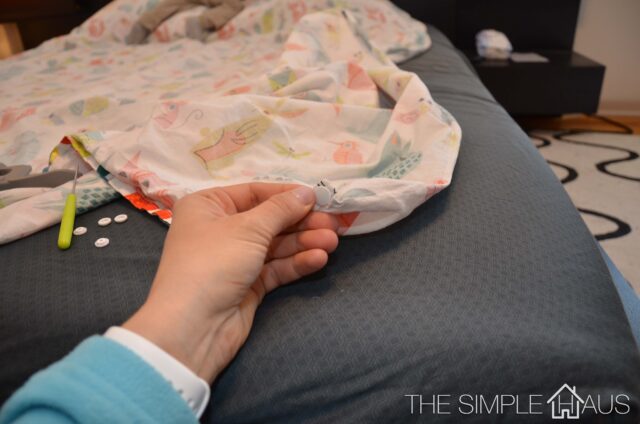
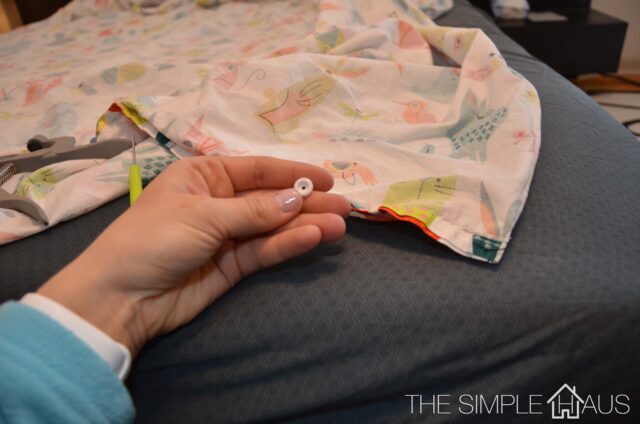
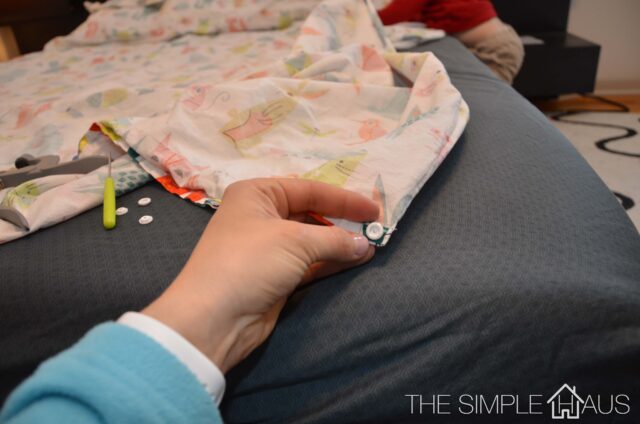
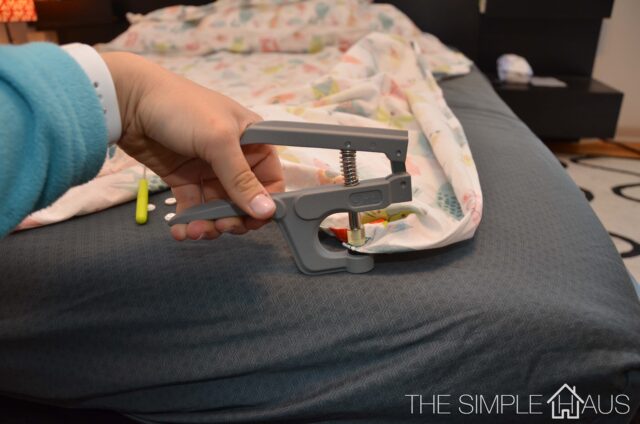
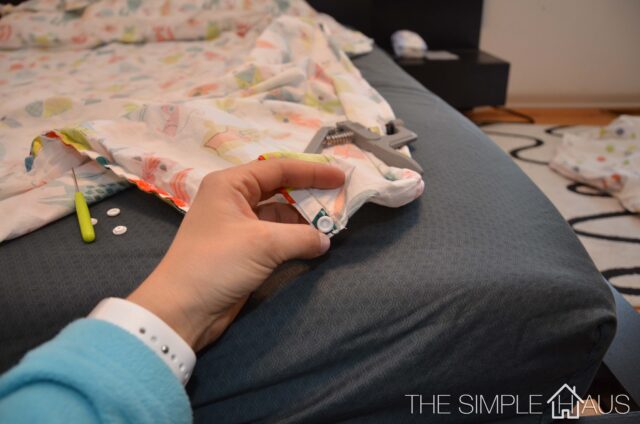
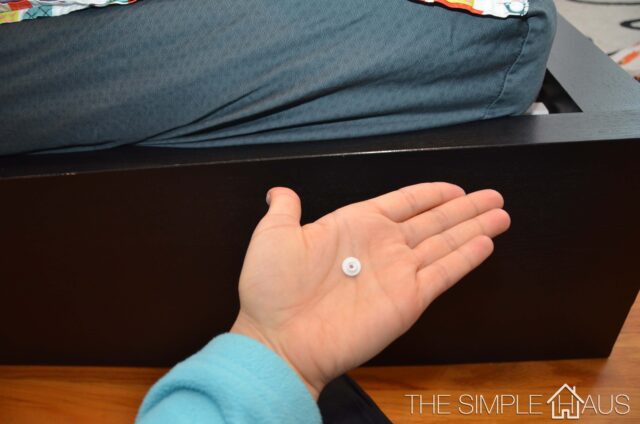
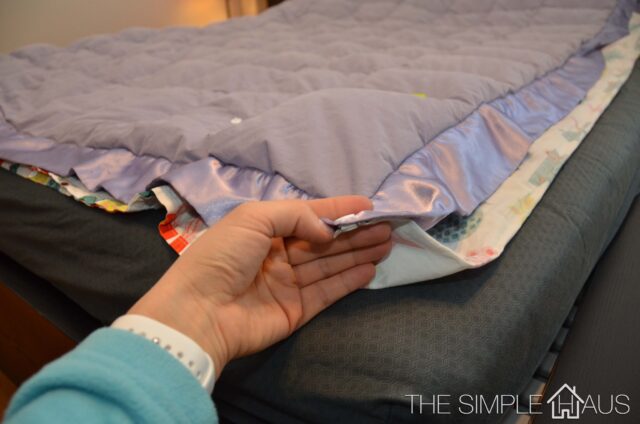
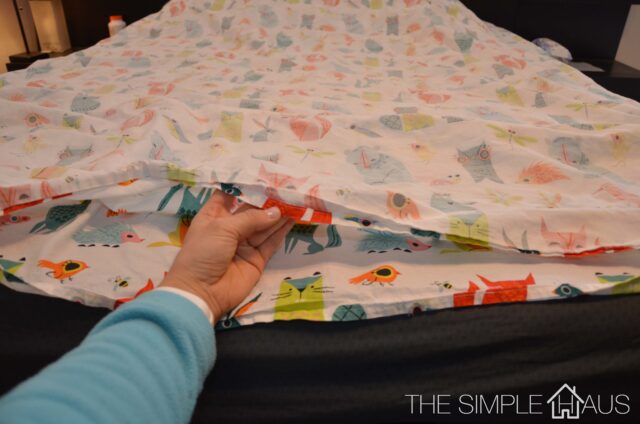
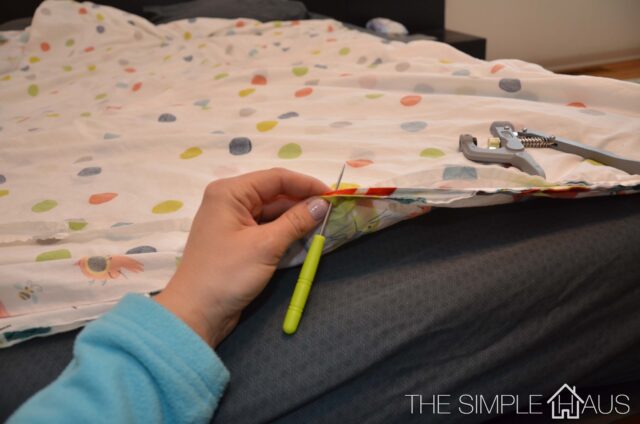
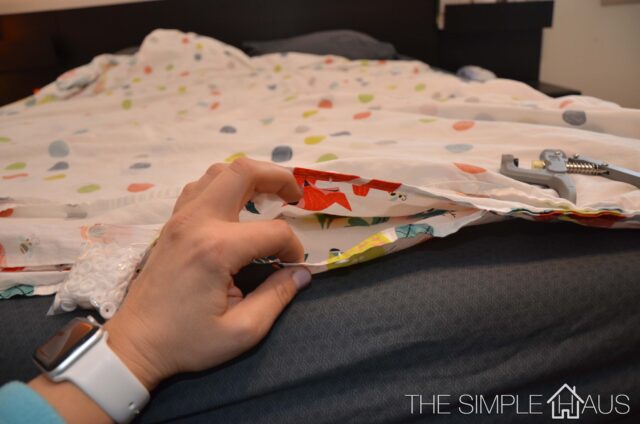
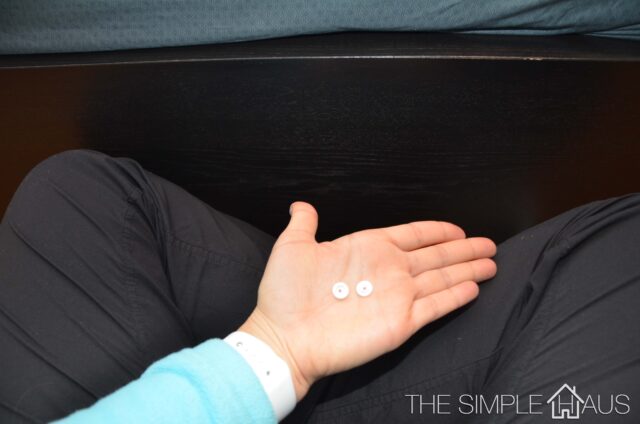
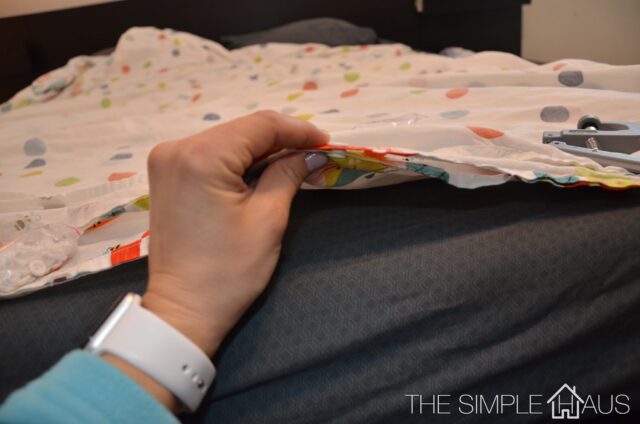
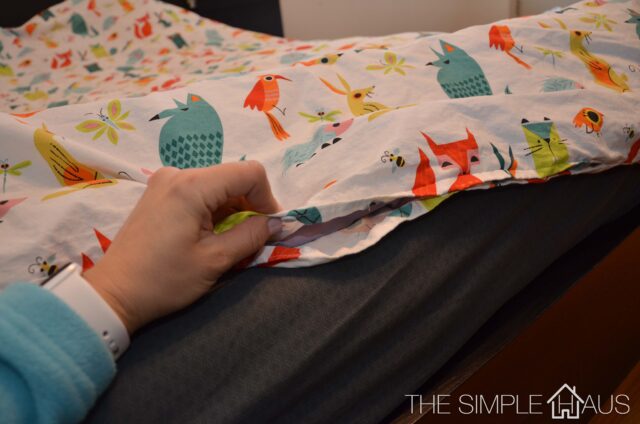
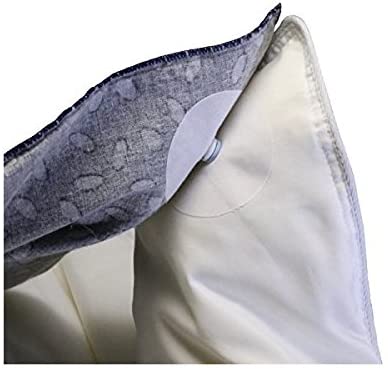
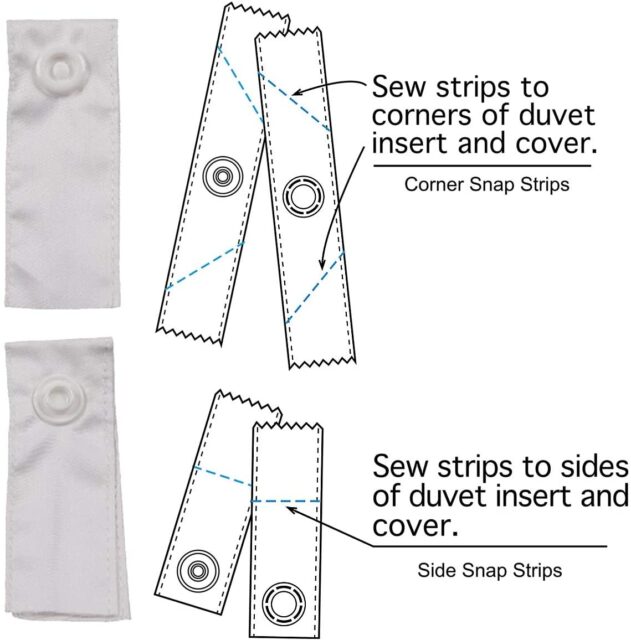
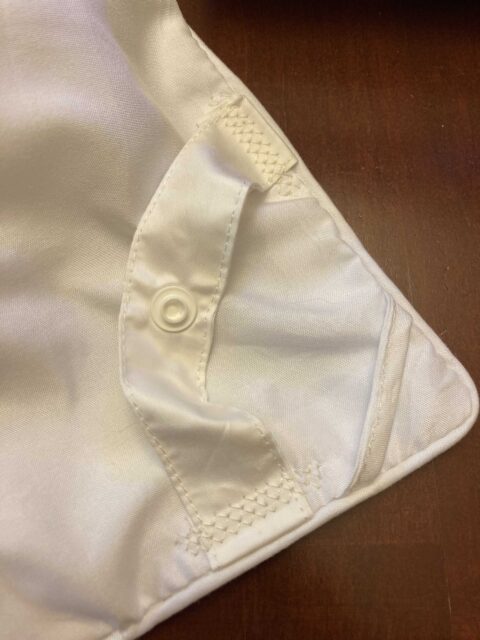
So let me show you how to add snaps to your duvet cover.

First you want to turn your duvet cover inside out, and lay it flat on your surface. You want to make sure that all of the snaps are facing up and the same way.
There is a female and male side to snaps(terms I’m using not sure their true names), so you will need to pick which one you want to have on all of your duvet covers and which type on all of your duvets/blankets. This way, all of your blankets and duvets will be compatible.
I use the female or sunken snap for all of my covers and the male or raised snaps for my duvets/blankets as shown here.
First you will need some snap pliers, these are for plastic snaps, but they sell some that are able to do metal snaps as well. I was able to find these at Hobby Lobby for less than $12 after the coupon. However, I don’t think they are allowing coupons anymore. I chose this kit because it came with everything I would need other than the snaps.
Then you will need some Snaps. These are the brand that go with the pliers.
I tend to buy these, they are the same thing but in bulk and tend to be cheaper.
I also wanted to mention that you want to make your hole around the seam area of the corner so the snap is nice and secure. Then you don’t have to worry about getting rips in the cover.
First you want to make a hole with the awl the is included in the kit. They are sold separately as well or you can use a thick nail and a hammer with a wooden piece underneath to stop you from damaging whatever is under your blanket.
Then you want to get a universal back piece.
You want to push it through the hole from the back so the flat rounded back is laying flat on the mattress shown here.
A view from the back.
Then take the sunken or female snap if that is what you decided to use for your covers.
Set it on top of the pointy portion of the snap sticking out. It will have a loose fit.
Place the corner with the snaps on top of the black piece on the snap pliers. Then once everything is lined up, press down. These pliers have a very nice grip, so it is very easy to compress without much effort or force.
The pliers press the pointy portion of the snap flat which then secures the top female portion of the snap. They are now together, and done. Then you do this to every corner of the cover making sure not to turn anything. You do not want to put one of backwards as it would be turned in the duvet and not lay as flat.
Then you want to make sure to gather the male or protruding snap piece and add them to the edges of the duvet using the same method as above.
I like to lay my duvet blanket on top of the cover and make sure as I am adding the snaps and everything is facing the right way.
Then snap them together and do a happy dance! I tend to keep and fold my duvet covers inside out so when I put the two together, I go around snap the corners and then turn it right side out. Everything stays in place, and it is much easier to do especially if you are putting on the cover yourself.
If your cover has no closures at the base like mine, then you can go ahead and add snaps to it. You could also sew in velcro or a zipper, but I find the snaps so quick and easy.
To keep everything lined up, I will lay everything flat. Then I poke the holes at the same time to make sure they are lined up properly.
Then add the two end pieces facing each other to make sure the snaps will work.
Pick one of each snap and decide which you want on the top and which on the bottom. It doesn’t matter in the application as long as you have one of each.
Like so.
And Snap… I feel like this should be the Bend and Snap from Legally Blonde. 🙂
Do it to the rest of your opening and revel in a simple job well done.
If you put a snap on wrong, I won’t lie it is a pain to get them off. You need a pair of pliers where you will break/crush the snap from the side to get them off. It is doable, but a pain. I have only had to do it once so far.

I was getting some questions on how the corner of the duvet looks once the snap is holding the blanket inside.
As you can see, it does pucker a little bit.
For me, this isn’t an issue as the function way out weighs the look. I do feel like when made on a bed, no one would notice this, but just something to note.

Here is my video on how to add snaps if you prefer that format instead of a picture format.
Here is how I prefer to put on a Duvet Cover with Snaps.

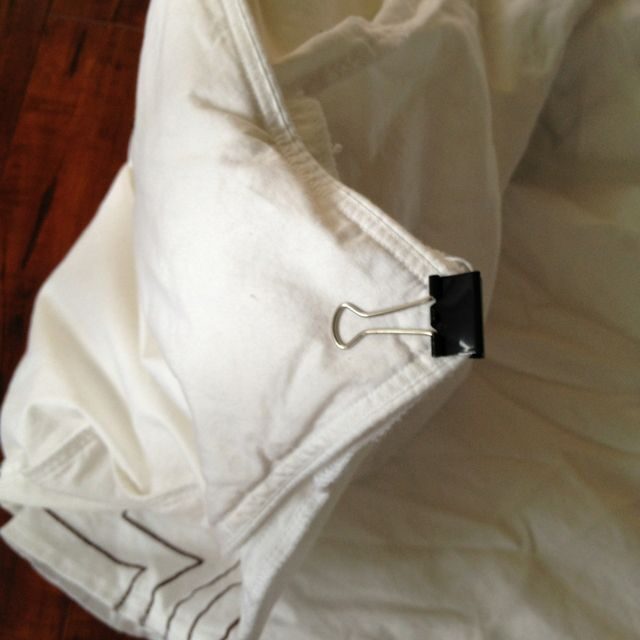
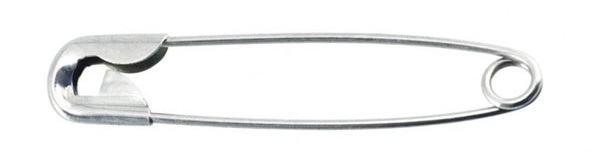
Now below, I wanted to discuss some of the other options that you have for securing a duvet especially if it is a short term option until you can get snaps or something else done.

I have seen a lot on pinterest and other youtubers like Emily Norris about using a binder clip. This option works well as most people have a few at their houses, but for me I don’t prefer having to remember to remove them each time. IF one is left on it could start to rust, etc. but for a temporary option can be great.
The safety pin is similar in that it is a great quick option, however it will take more time to take off and on than snaps or even binder clips. I’m not a fan of this as you keep putting holes in your covers and duvet which can over time really weaken both items.
Some duvet covers come standard with ties built in. These are a nice option, but sometimes they will loosen over time or you have very strong knots that are hard to undo. I do like how you can easily sew these onto any duvet cover, but that requires more time by hand or a sewing machine which some don’t have. I do want to point out that if you want to sew and don’t have a machine check your local library. Ours has a sewing machine and a serger for free to use or ask a friend. I would also suggest using old shoe laces to sew in as ties.
These pinion pins seemed like they would work, but again you have to have a magnetic base to pull off the bases easier, and they can get lost. They also will be repeatedly making holes in your covers and duvet so not my top option.
These comforter clips would work, but at this point, I would think the binder clips are better and cheaper. I would worry about loosing them while my covers are in the wash.
These comforter clips are marketed toward being easier on the hands if you have a harder time with securing some of the above options. They have pretty good reviews, but I would be annoyed with always having to keep track of them, but they can be a good option.
I then found these corner keepers; you can have the snaps, but just iron on the pieces instead of making holes. I wasn’t a fan. I had mine coming off after having ironed them on, and I wasn’t a fan of how they looked once ironed on to the duvet and covers. Some people on amazon loved them, but they left me disappointed.
These snap strips are really nice if you don’t want to mess with getting the snap pliers and have a sewing machine.
Once sewn on they do a good job distributing the strain of holding the two together. I still prefer just to use the snaps because I find them so versatile, but this is my second favorite option for sure.

Have you used any of the methods I mentioned above? I’m sure I missed another great way to secure a duvet cover, please comment below if anything is confusing to you. Thanks for reading!

Links (Affiliate)
Binder Clips – https://amzn.to/3rIFqYH
Safety Pins – https://amzn.to/3v50omF
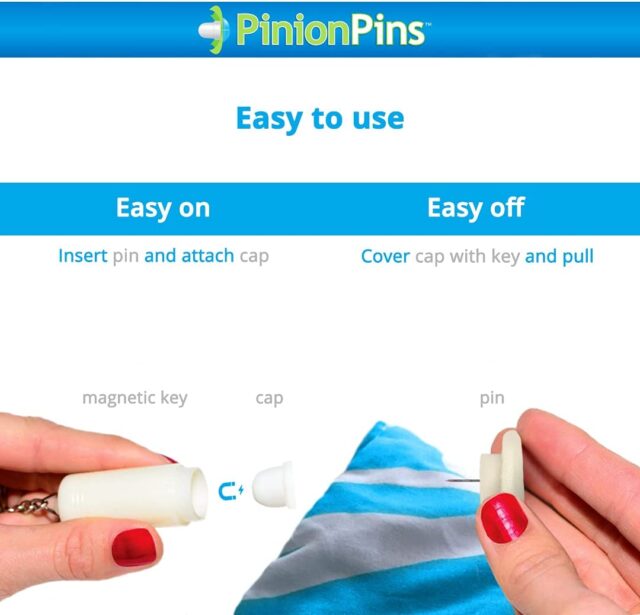
Pinion Pins – https://amzn.to/3K2RnPd
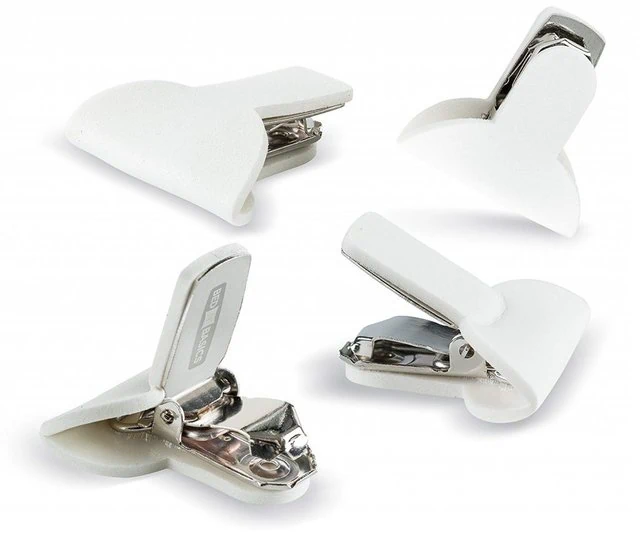
Comforter Clips – https://amzn.to/3rIAOC1
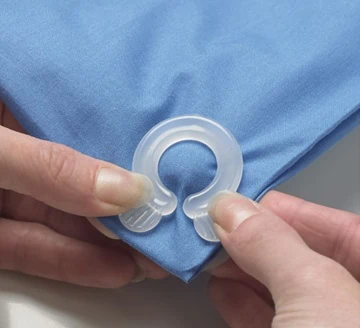
Corner Keepers – https://amzn.to/3MjcVZu
Comforter Clips – https://amzn.to/3Ldzeji
Snap Strips – https://amzn.to/3v50eM5
Snaps – https://amzn.to/3jYWtBt
Snaps Bulk – https://amzn.to/3vdYccN
Snap Plier Kit – https://amzn.to/3K4NTM4
Duvet Covers : https://www.ikea.com/us/en/p/vaenkret…
https://www.ikea.com/us/en/p/lattjo-d…
https://www.ikea.com/us/en/p/upptag-d…

My Gear Links(Affiliate):
Laptop – https://amzn.to/3xYg397
Editing Mouse – https://amzn.to/3xVYJBG
Camera/Phone – https://amzn.to/37Mf7tS
DJI Wireless Microphones – https://amzn.to/3vNhQvd
Tripod – https://amzn.to/3LnmtCx
DJI Tripod – https://amzn.to/37JIo8G
Jooby Tripod – https://amzn.to/3KmKw3a
Cell Phone Adapter – https://amzn.to/37M5ZoY
Camera Microphone – https://amzn.to/3vUqtEm
Voice Over Microphone – https://amzn.to/3KobCqS
Lights – https://amzn.to/39b2wAI
Epidemic Sound – https://share.epidemicsound.com/7ejjvb
Tube Buddy – https://www.Tubebuddy.com/TheSimpleHaus
Campsite Bio – https://campsite.bio/referral-NAUY4KSC
My Instagram: https://www.instagram.com/thesimplehaus/

The footage in this video is property of The Simple Haus. You are not allowed to use this footage without permission. To request permission please email [email protected] This post contains affiliate links, which means I make a small commission at no extra cost to you, but this helps me to create better videos.

You may also like

Leave a Comment